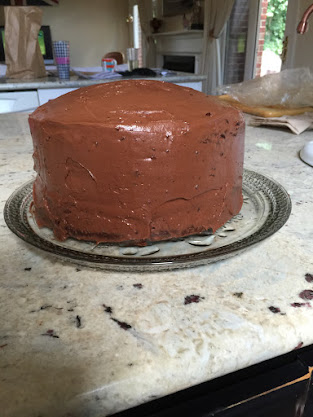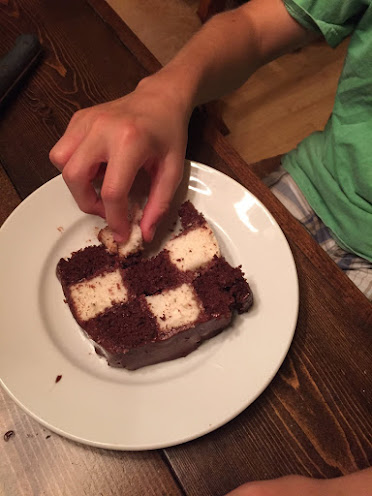
Grandson wanted a chocolate cake with chocolate icing for his 13th birthday–I wanted to make a checkerboard cake for him, with both chocolate and vanilla cake and chocolate icing. He was pleased telling me, “Good job, Grandma!” Well, high praise that!
Sosew sent me a picture of a tri-colored checkered cake a while back…so it’s all her fault! The cake isn’t difficult, but takes some time and willingness to work with it to get it to turn out well. Both cakes are 3 layers high, but the three colored cake requires 3 layers, each a different color. The two-colored checked cake requires 4 layers! And you could make it 4 layers tall if you wished.
Bake 4 round cakes (two layers of each chocolate and white). I used what I had on hand:

Before I mixed up the batter, I sprayed and lined the cake pans with wax paper like this:

(Cut round pieces to fit the bottom and strips for around the inside edges. I always cut slits in the top and bottom pieces of the edge pieces so they will fit snugly around the pan. In addition, I use oven-safe baking strips designed to fit around cake pans–made from an oven-safe material which one wets and then wraps around the outside of the cake pan. This keeps the cakes level as they bake.)
Bake your cakes and cool, remove from the pan after cooling a couple of minutes, remove the wax paper, and let cool completely. Then wrap and freeze the layers separately.
Whip up your frosting–mine is homemade chocolate: 6 Tablespoons butter (softened, whip it first), add 2 2/3 cups of powdered sugar (does not have to be sifted), 1/3 cup milk, 1/3 to 1/2 cup of cocoa powder and 1 teaspoon of vanilla. Mix well.
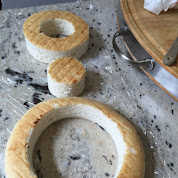
When frozen (will take an hour or so), remove two layers–one chocolate and one white. I happened to have this insert, originally designed to allow one to bake a three-different colored or flavored cake together. But I used it to cut the layers into three circles:

If you do not have one of these cutters improvise! Freeze the cake layers, then find two bowls/glasses/whatever might work–to get the three circles about even (lay them out on top of your cake pan first). Lay one bowl/glass upside down on top of your cake and carefully cut around it, remove the bowl/glass and make sure you have cut the circle all the way through the cake.
Cut the white cake layer the same way. Separate the different circles. Around the inner portion of the outside chocolate circle, place frosting. I briefly put the separated sections of the cake back in the freezer. Cake is much easier to handle and frost when it is frozen.

Insert the next circle and it will adhere to the frosted portion. Now, frost the inside of that circle:
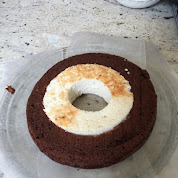
after frosting, insert the center.

Frost the top of this layer and add the next layer in reverse order.


Do the reverse for the next layer and then repeat this layer for the top/third layer of this cake.
You will have one layer left….a chocolate outer and inner circle and a white centered circle. Eat it yourself! Or you can make this a 4 layer cake, but you will likely need to insert some wooden dowels to hold it together if you do.
Frost the entire cake (you might need another batch of frosting).